
THIS INSTALLATION MANUAL EXPLAINS EVERYTHING YOU NEED TO KNOW BEFORE INSTALLING GOMDOLIGHT. FAILURE TO READ THIS DOCUMENT BEFORE INSTALLING WILL ALWAYS LEAD TO VARIOUS UNEXPECTED PROBLEMS. I WILL NOT ANSWER ANY QUESTIONS ALREADY ADDRESSED IN THIS DOCUMENT.
|
– TABLE OF CONTENTS – I. GomdoLight Overview II. Components III. Recommended Users IV. How to Install V. Upgrading and Uninstalling VI. License Agreement VII. Third Party Components VIII. Downloads and Changelogs IX. GomdoLight Tools X. Support
|
I. INTRODUCTIONS
Greetings,
Introducing GomdoLight, the most advanced, user-friendly, fully-customizable system enhancement pack for KOREAN smart devices.
GomdoLight modifies official stock firmware to remove all the unnecessary components preloaded by operator/manufacturer, and reorganizes key system parts to achieve the most ‘basic’ Android OS with manufacturer’s flavor. This will somewhat improve battery life, system stability, and responsibility. But most of all, you will find your device more comfortable to use.

WARNING!
GOMDOLIGHT INSTALLATION PROCESS ALWAYS INVOLVES MODIFICATION OF SYSTEM PARTITIONS.
ONCE A SYSTEM PARTITION IS MODIFIED, YOUR WARRANTY WILL BE VOID.
II. CHANGES YOU CAN EXPECT
Here you can find what components are added, modified, or removed when you install GomdoLight.
1. Components Added
The following lists illustrate all the apps and other components added to system, when installing GomdoLight.
(1) System apps
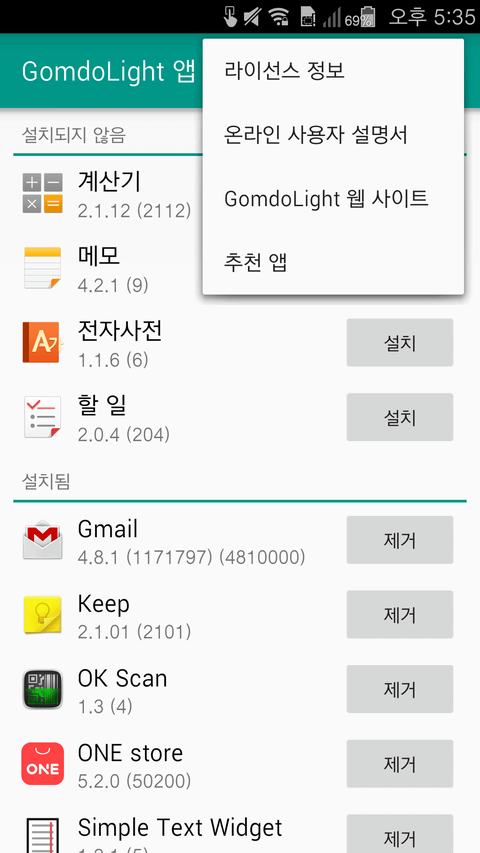
- GomdoLight App Manager: Provides bundled apps and useful links
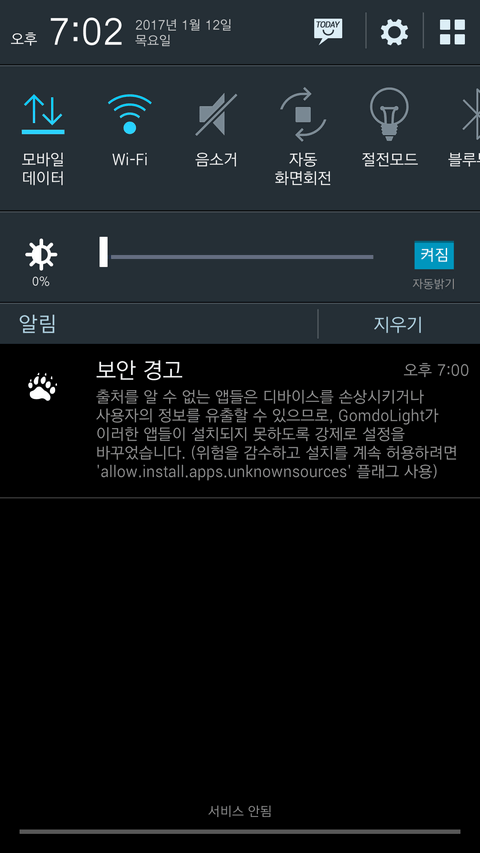
- GomdoLight Notification Provider: Enables GomdoLight to display toast messages and notifiations
(2) GomdoLight Engine features
- GomdoLight Flags: Performs various administrative tasks by placing specially named files in /sdcard/GomdoLight folder and restarting the device
- GomdoLight Startup Optimizations: Optimizes and organizes the device during system startup
- GomdoLight Online Upgrade: Automatically upgrades GomdoLight when a new version is released
- …and much more.
(3) GomdoLight App Manager bundles
- Gmail: Google’s Gmail service client
- Keep: A notetaking application to quickly create, access and organize notes, lists and photos
- MoreLocale 2: An app to choose system locales not natively supported by device
- OK Scan: A QR code scanner with very high response rate
- ONE Store: Online store for apps, books, music, etc. available in South Korea only
- Simple Text Widget: Widget app to display any text on the home screen
- SMS Backup+: Automatically backs up SMS/MMS to Gmail
- SoundAbout: An app to redirect audio output
- Titanium Backup: A backup solution, needless to say
- Xposed Installer: Installs and manages the Xposed Framework and Xposed modules
- X-plore: A very powerful file manager tool that support root
- YouTube: Legacy YouTube app that supports screen-off playback
- Stock Pantech VEGA Apps: Calculator, Memo, To Do List, E-Dictionary
2. Components Removed
After installing GomdoLight, the following components (if available) will be removed from the system partition, and lose their status as ‘preloaded components’. However, if you need them again, you can still reinstall those via Play Store. NOTE: If those components are updated before installing GomdoLight, each updated component will have its updated copy on the data partition, and it will be treated as a user-installed app. You will have to remove such components manually.
(1) Google apps
- Street View, Hangouts, Drive, Chrome, Play Books, Play Movies & TV, Play Games
- Gmail (relocated to the GomdoLight App Manager), YouTube (relocated to the GomdoLight App Manager)
(2) Manufacturer bundles
- AppsPlay, OTA Firmware Update, Hancom Office Viewer
(3) SKT apps
- Mobile T world, SKT Remote Diagnostics, T cloud, T mode, T services
- SKT startup/shutdown sounds
- T store (replaced by ‘ONE store’, found in GomdoLight App Manager)
(4) KT apps
- MoCa Tree, olleh cs
- olleh market (replaced by ‘ONE store’, found in GomdoLight App Manager)
(5) LG U+ apps
- Call Help Service, Customer Center, Smart Wallet, U+Box, Mirror Call
- U+ store (replaced by ‘ONE store’, found in GomdoLight App Manager)
3. Components Replaced
- VEGA Home, Design Home, Style, Today: Removed all associations with deprecated AppsPlay service
- Settings: Removed FOTA (VEGA Station) menu entry
- System UI (status bar): Removed carrier bundled app icons from recent apps
III. RECOMMENDED USERS
GomdoLight takes out many features from the stock firmware. Therefore it is generally not advisable for Android first-timers.
Recommended for the following users who:
- …want their device to be clutter-free
- …want to unleash the device’s full potential
- …seek certain level of balance between stability, comfort, and performance
- …have a strong will to try to solve the problem when one arises
- …try to post questions as detailed as they can
But NOT recommended for the following users, who:
- …don’t know what features their device have
- …are new to Android OS, and know almost nothing about it
- …prefer to have many features loaded as possible
- …refuse to read documents, even if they are necessary to install and use GomdoLight
- …do not understand the installation process always involves some degree of risk
- …ask first when a problem arises, without searching
- …ask other person to install GomdoLight for them, without studying and trying
- …do not like me (Gomdolius, the developer) for whatever reason
IV. HOW TO INSTALL
This section explains how to perform a fresh installation of GomdoLight.
▶ To upgrade an existing installation of GomdoLight, click here
▶ To completely uninstall GomdoLight from your device, click here
(1) Installation process overview
Installation process can largely be divided by the following categories: 1) DATA BACKUP AND INITIAL PREPARATION, 2) STOCK FIRMWARE INSTALLATION, 3) PREPARING CUSTOM RECOVERY, 4) CONFIGURING AND INSTALLING (FLASHING) GOMDOLIGHT.
From now on, this manual will cover EVERYTHING you need to meet all conditions required to successfully install GomdoLight, and provide a step-by-step explanation for each stage. This document is indeed lengthy, however on the other hand, is designed from the ground so that it could be understood very quickly, even for those who never installed a custom firmware before. Your confidence (NOT overconfidence) is the most important thing when installing GomdoLight – please do not falter, just ease yourself and follow the instructions.
(2) Supported device models
You have to have a device compatible with GomdoLight, of course, to install GomdoLight.
- VEGA IRON2: IM-A910S, IM-A910K, IM-A910L (Hereafter, “Iron2”)
In rare cases GomdoLight might work on other devices but it is not guaranteed. Installing GomdoLight on devices not listed as compatible, is neither recommended nor supported.
1. Data Backup and Initial Preparation
Before you begin, you would want to make sure that the whole installation process will not get interrupted by a simple and silly oversight, and that nothing will happen to your precious data when something goes wrong. Therefore, first we will back up your critical apps, data, and files, and download some tools (and install some of them) and grab files that are essential to install GomdoLight onto your device.
* NOTE: This section is shared by numerous GomdoLight installation manuals on this website. You will see all links for SEC(Samsung Electronics), LGE(LG Electronics), Pantech devices. Choose what is appropriate for you.
(1) Backing up your apps, data, and files
Nothing is perfect after all, and something may go wrong during the installation process. Before you continue, you would want to back up your stuff if it means anything to you.
- Chat history for instant messenger apps if the chat is stored locally in your device
- Your personal information, such as contacts, text messages, call logs, alarms if not synced to cloud services
- Your personal contents, such as documents, pictures, music, videos stored in the internal storage
- Miscellaneous files, such as game saves, exported settings and data, backup files, your personal certificates stored in the internal storage
For your personal information, first try to sync them with Google or your device manufacturer’s cloud services (remember, syncing with cloud is the safest way to prevent loss of your personal information), and only if you’re not satisfied with the sync, employ whatever trustworthy backup solutions you like. For your personal contents and files, just copy them to somewhere safe, outside the internal storage. However, for apps and their data, you may find that not many backup solutions support backing up these, since this require root. It is therefore advisable that…
- for apps that are easy to install and configure, you don’t need to back them up.
- for apps with own backup/restore/export/import features, you should use those features.
- if you’re on an LGE device, you can stop worrying and just use its built-in LG Backup. This can back up everything.
- if your device is rooted, or if you can root your device, you should consider ▷ Titanium Backup app. This powerful app can back up everything but requires root.
- if your device has a custom recovery installed, you should try its Nandroid backup feature. This creates a complete snapshot image of entire device.
Remember, the more, the better. Use as many backup methods as possible and keep multiple copies of backup data in multiple places. However, please keep this in mind: the INTERNAL STORAGE of your device may be FORMATTED when you install stock firmware, unlock bootloader, or factory reset the device – it is NEVER A SAFE PLACE to store your backups and personal contents.
(2) Downloading the GomdoLight Installer
It is obvious you need this GomdoLight Installer in order to install GomdoLight. ▷ Click here to open the Download section of this document in a new window.
Warning! By downloading the GomdoLight Installer you automatically agree to the ▷ GomdoLight License Agreement. If you do not agree, do NOT download the GomdoLight Installer. In this case you will not be able to install GomdoLight.
(3) Copying the GomdoLight Installer to your device
After downloading the GomdoLight Installer, now is a good time to copy it to the internal storage of your device. This will make the installation process significantly easier (in most cases). Also, if your device has an external SD card inserted, copy the GomdoLight Installer to that external SD card as well.
(4) Drivers
You should download and install the device driver package before installing.
- For SEC devices: ▷ SEC official web site
(* The page is in Korean language. Click on the blue button labeled “통합 USB 드라이버 ▶” to download the driver) - For LGE devices: ▷ LGE official web site
- For Pantech devices: ▷ Pantech official web site
(* The page is in Korean language. Select your device model first, then from the search result, click on the link labeled “▶ USB드라이버” to download the driver) - If above drivers fail to function properly, try the ▷ Google USB driver
(5) Downloading manufacturer-specific firmware flashing tools
These tools are used to flash stock firmware images and/or custom recovery images.
- For SEC devices: You will need the ▷ Odin tool. Download it here.
- For LGE devices: For most of the cases, you will need the ▷ LG Flash Tool 2014. Some devices might require something else, but in that case this manual will provide with right tools when you need them.
- For Pantech devices: Not needed.
(6) Downloading the GomdoLight Sideloader tool
GomdoLight Sideloader is used when you need to transfer and install recovery zips (such as GomdoLight Installer) at the same time, directly from your PC without copying them onto your device. You may not need this tool during the installation process, but it never hurts to prepare. ▷ Download GomdoLight Sideloader here. (* The page is in Korean language. Find the link labeled “GomdoLightSideloader_en.rar (ENGLISH)” to download)
(7) Unlocking Developer Options and enabling USB debugging
For these tools to access your device, you need to let them communicate with your device through ADB (Android Debug Bridge). To do this, first ▷ unlock the Developer Options, then inside the Developer Options find and enable ‘USB debugging’.
2. Stock Firmware Installation
GomdoLight requires a compatible version of stock firmware already installed on the device prior to its installation. This is because GomdoLight is essentially a large-scale patch which is installed by modifying the pre-existing stock firmware. Therefore, if your device has an incompatible version of stock firmware, or, a completely different type of custom firmware, such as CyanogenMod, MIUI, or AOSP, you MUST install a compatible version of stock firmware before installing GomdoLight.
And, aside from this, the stock firmware installation process explained from now on is very important for when you uninstall GomdoLight or update the base stock firmware. You are strongly advised to carefully read the explanation below and get yourself somewhat accustomed to it.
(1) Check your version
First, on your device, check Settings → About phone/tablet/device → Software information/info/version to find the version of the firmware currently installed. (Specific menu structure and names may vary) Then, from the ‘firmware compatibility table’ below, find your device model. If the firmware currently installed has the same version number/code with what is described in the table, you’re just good to go, and safely skip to the next step.
(2) Stock firmware compatibility table
The ‘firmware compatibility table’ below illustrates the range of version compatibility for each supported device.
| Device Model | Version Compatible | ||
| minimum | recommended | ||
| Iron2 | IM-A910S | s0224129 RecoveryZIP |
= |
| IM-A910K | s0844131 RecoveryZIP |
= | |
| IM-A910L | s1239127 RecoveryZIP |
= | |
(3) Installing the supported version of stock firmware
Your firmware version might be too low, or your device may running a custom firmware environment other than GomdoLight. In this case you need to install or update the stock firmware first. To do this, follow these steps below.
1) First, scroll up a bit to the firmware compatibility table above, and find a link to the stock firmware package for your device model.
- With this package you can (re)install the entire system/OS area.
- This package can also be used when uninstalling GomdoLight and reverting to stock firmware (which, is generally a poor decision).
2) Download the package.
- This could take some time since the file should be very large.
3) Connect the device to your PC via USB.
- You need to have the driver for your device installed on your PC at this point.
4) Install the stock firmware package. There are three ways to do this:
- If your device has a custom recovery installed, copy the package to the device’s internal storage or external SD card (external SD card only if device is encrypted), reboot to recovery, and just install the package as you install any other custom firmware.
- If your device does NOT have a custom recovery, unpack the GomdoLight Sideloader tool you have downloaded. Then, find the _SIDELOAD folder, and put the package into that folder. Finally run _GomdoLightSideloader.cmd and follow the on-screen instructions. This is probably the easiest method.
- Also, you can temporarily boot into custom recovery using ▷ custom recovery tools designed to work with GomdoLight and install the package as if your device has a custom recovery installed (like explained above).
3. Preparing Custom Recovery
To run the GomdoLight Installer, a custom recovery should be loaded on your device first. For Pantech devices this is very easy as you do not need to root your device or unlock bootloader at all. Just download a right custom recovery package for your device, and run the recovery loader/installer script, then you’re done.
(1) Downloading a custom recovery for your device
A ▷ dedicated supplementary document for custom recoveries is available. Download the custom recovery for your device ONLY.
(2) Unpacking the custom recovery package (RAR archive)
Open the archive with your favorite archiver utility, such as BandiZip, 7-Zip, or WinRAR utility. Extract the folder out of the archive.
(3) Loading the custom recovery
In the folder you’ve just extracted above, you will find ‘_GomdoLightVEGArecovery.cmd’. Run this script to load and install the custom recovery. Your device will reboot twice, then the custom recovery interface will appear on the screen.
(4) Device-specific notices
Some devices might not function properly when you load a custom recovery.
- Iron2: The custom recovery package provided by GomdoLight is designed to load tekcafe TWRP 2.8.6.0 by default, which shows the highest compatibility with GomdoLight Installer. However, it is reported that some devices fail to load this recovery image. To resolve this issue, a newer version, 3.0.2.0 of tekcafe TWRP recovery is also included in the package. Drag and drop this image onto _GomdoLightVEGArecovery.cmd script to load this particular version. However, please understand you’re very likely to experience serious graphical glitch during installation with tekcafe TWRP 3.0.2.0, though it will leave no actual negative impact to the system after the installation is complete.
4. Configuring and Installing (Flashing) GomdoLight
You’re almost there, and this is the part where you FINALLY run the GomdoLight Installer and install GomdoLight onto your device.
(1) Running the GomdoLight Installer
There are two ways to run the GomdoLight Installer.
1) Running the GomdoLight Installer locally from the device storage
- This method would be easiest if your device is on a custom recovery.
- If you have already copied the GomdoLight Installer to device storage, just select ‘Install’ or ‘Install Zip’ from the menu, locate the GomdoLight Installer, and select it.
- If you didn’t copy the GomdoLight Installer when you downloaded it, please do so now, and the rest is the same as above.
2) Sideloading the GomdoLight Installer from PC
- This method is useful when your device is encrypted and you do not have an external SD card. (Custom recoveries are denied access to the internal storage if the device is encrypted)
- This method is also useful when your device has no custom recovery installed and the stock recovery is signed with testkey.
- On your device, activate the ADB sideload mode.
- Stock recovery: There should be a menu labeled ‘Apply update from ADB’.
- PhilZ, CWM: Generally, sideload menu should be inside ‘Install Zip’.
- TWRP: Generally, sideload menu should be inside ‘Advanced’.
- On your PC, unpack the GomdoLight Sideloader tool if you haven’t done so yet. After unpacking, look into GomdoLight Sideloader’s folder you just extracted.
- Inside the GomdoLight Sideloader folder, you will find a folder named _SIDELOAD. Put the GomdoLight Installer into that folder, then run _GomdoLightSideloader.cmd and follow the on-screen instructions.
- Remember that you’re in recovery mode now. GomdoLight Sideloader will ask you about this.
- GomdoLight Installer will run automatically.
(2) Configuring GomdoLight
Now you’re finally installing GomdoLight!
1) Battery indicator styles
During the configuration process you will be given a choice of battery indicator styles. However you may not understand what each option means, so here are some screenshots.
- Easy-to-Recognize

- Center-aligned

- Stock

If you want ‘stock’ battery indicator, select the third option (‘stock’), NOT the fourth (‘Do not overwrite the status bar’) one. ‘Do not overwrite the status bar’ does not replace the related system files, and a lot of GomdoLight’s status bar improvements will become unavailable. This option is intended only for preserving third party aesthetic modifications.
2) Adblock
Whatever option you choose, you can easily enable/disable adblock with ‘enable.adblock’ and ‘disable.adblock’ flag. You do not have to run the GomdoLight Installer again just to change adblock settings.
(3) First boot and function check
The GomdoLight Installer automatically reboots the system upon finishing.
To confirm if GomdoLight is properly installed, check the followings:
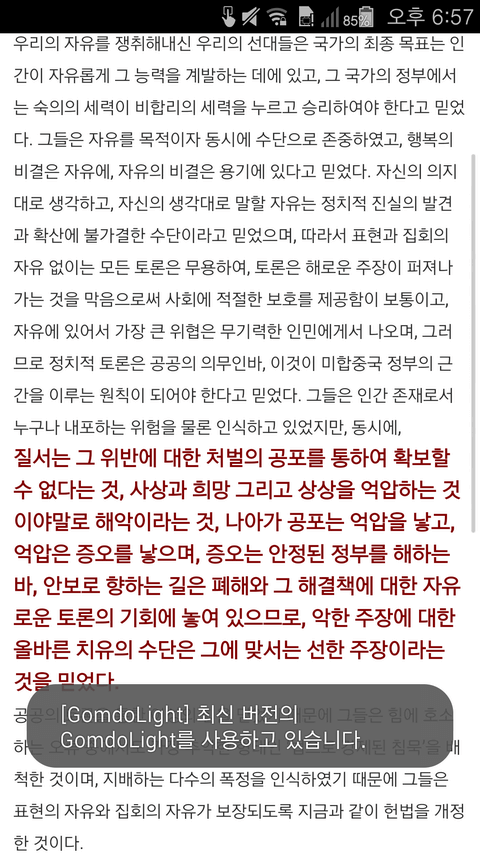
- Your device should display some status messages, such as “[GomdoLight] System ready.” in toasts bubbles.
- There should be a file named GomdoLightSITREP.txt in /sdcard/GomdoLight, which may be used for diagnostic purposes.
Congratulations,
Now you have successfully installed GomdoLight!
* If you chose to disable ‘Email’, or ‘Internet’, those are left active on the first boot. This is intentional; they remain active on the first boot for better compatibility and error handling. When you restart the device they will be disabled.
V. UPGRADING AND UNINSTALLING
1. Upgrading to a New Version
GomdoLight is very well maintained and updated regularly to meet your needs. Upgrading to the latest version of GomdoLight is generally easy. However you should carefully follow the upgrade instructions for each release. There are two ways to upgrade GomdoLight: automatic and manual.
(1) GomdoLight Online Upgrade (OTA)
This is the easiest method ever devised to upgrade GomdoLight. When you boot the device, sometimes GomdoLight will automatically check if a new version is available. When it discovers a new release it will notify you, and…
1) If the device is connected to a Wi-Fi network at that time,
- GomdoLight will automatically download the latest GomdoLight Installer.
- When it is downloaded completely, GomdoLight will show you how to apply the update (update instructions).
- In /sdcard/GomdoLight, create an empty file and name it ‘gomdolight.online.upgrade’, then reboot the device.
- GomdoLight Installer will automatically run.
- Select the device model, and from the main menu choose the ‘Upgrade/Repair’ option.
2) If the device is connected to the data network at that time,
- GomdoLight will NOT automatically download the GomdoLight Installer, to protect you from being charged unexpectedly.
- In /sdcard/GomdoLight, create an empty file and name it ‘gomdolight.online.upgrade’, then reboot the device. Only then will GomdoLight download the latest GomdoLight Installer. (You’re giving an explicit order to download the installer anyway by creating that file)
- When the download is complete, GomdoLight will show you how to apply the update (update instructions).
- Reboot the device. GomdoLight Installer will automatically run.
- Select the device model, and from the main menu choose the ‘Upgrade/Repair’ option.
(2) Manual upgrade
Sometimes, you might want to do this all by yourself, or the new release might not support upgrading by GomdoLight Online Upgrade.
1) Upgrading via the ‘Upgrade/Repair’ option
- Download the GomdoLight Installer from this website.
- Run the GomdoLight Installer. This is done by manually running it in the custom recovery, or by using the GomdoLight Sideloader.
- Select the device model, and from the main menu choose the ‘Upgrade/Repair’ option.
2) If the new version requires a base firmware update, this is essentially the same thing as a fresh installation of GomdoLight.
- Therefore, first ▶ Uninstall GomdoLight completely, and start from scratch as if you’re installing GomdoLight for the first time.
- Sometimes an OTA update might be still available after flashing the stock firmware. In this case refer to the firmware compatibility table to find out whether if the update will be compatible with GomdoLight.
Most of times just ‘Upgrade/Repair’ option will do, but sometimes there might be some special instructions, and there might be times that a new version of GomdoLight requires a base firmware update. Remember, it never hurts to read the upgrade instructions.
2. Uninstalling GomdoLight
First, back up everything, in case the stock firmware might fail to flash properly. Then, ▶ install the stock firmware to completely uninstall GomdoLight.
VI. GOMDOLIGHT LICENSE AGREEMENT
License for GomdoLight can be found below. This document is very important as it defines your legal rights and obligations; please read very carefully.
GomdoLight License Agreement (opens in a new window)
VII. THIRD PARTY COMPONENTS
All third party components are credited in the GomdoLight Users’ Community (Korean).
VIII. DOWNLOADS AND CHANGELOGS
It is recommended that you download the GomdoLight Installer from PC.
Remember, ALWAYS DO AN INTEGRITY CHECK before installing GomdoLight.
Corrupted or damaged installer can critically damage your device.
HOLD ON! If you find GomdoLight useful, how about showing your support by donating some? Even the smallest amount helps me a lot.
2017. 11. 1. GomdoLight KitKat Wave 5, Revision 4 – for Pantech VEGA IRON2
업데이트 수준update level: 중규모medium
중요성importance: 높음high
기존 사용자 업그레이드 지침:
- 설치 옵션 선택|Installation Options
GomdoLight 버전 지원되는 설치 옵션|Installation Option Supported 5.0 ~ 5.3bis ‘업그레이드/복구’ 옵션으로 간편 업그레이드 가능
Easy upgrade supported (Select ‘Upgrade/Repair’ option from the GomdoLight Installer)4.10 ~ 4.11 순정 복원 후 완전히 새로 설치 (업그레이드 지원 안함)
Upgrade not supported (revert to stock, and perform a fresh install from scratch)
* GomdoLight 업그레이드 방법에 대해 자세히 알아보려면 ▶ ‘새로운 버전의 GomdoLight로 업그레이드’의 설명을 참고하십시오.
- VEGA IRON2 (IM-A910S/K/L)
download – GLkk-Wave5.rev4_pan_IRON2.zip
변경점changelog:
- 개선: 오류 수정 및 안정성 향상
Improved: Bug fixes and stability improvements - 개선: EasyMod 설치 안정성 대폭 향상
Improved: Greatly improved reliablity of EasyMod installation - 개선: EasyMod 설치 과정을 더욱 사용자 친화적으로 개선
Improved: EasyMod installation is now more user friendly - 변경: EasyMod 패키지 형식 개정
Changed: Introduced new EasyMod package format - 변경: GomdoLight 앱 관리자에서 MoreLocale 2를 더 이상 제공하지 않음 (처음 설치하는 경우에만)
Changed: Removed MoreLocale 2 from GomdoLight App Manager (first time new users only)
WARNING: Do NOT mirror the GomdoLight Installer files.
GomdoLight Installers should be downloaded only from http://gomdolight.com.
DO NOT UPLOAD TO OTHER SERVERS.
2017. 8. 28. GomdoLight KitKat Wave 5, Revision 3 – for Pantech VEGA IRON2
업데이트 수준update level: 중규모medium
중요성importance: 높음high
변경점changelog:
- 개선: 오류 수정 및 안정성 향상
Improved: Bug fixes and stability improvements - 개선: 최신 유니코드 표준에 따라 지원되는 이모지의 범위 확대
Improved: Extended support for Emojis conforming to latest Unicode standards - 개선: 일부 알림 메시지의 부정확한 문언 수정
Improved: Revised inaccurate/improper notification messages - 개선: bootloop 상황을 감지하여 10회 이상 부트 실패하면 리커버리로 강제진입하도록 변경
Improved: GomdoLight now detects bootloops, and reboots into recovery if bootlooping for 10+ times - 개선: disable.superuser.manager.installer 플래그 재도입
Improved: Re-introduced the ‘disable.superuser.manager.installer’ Flag - 수정: GomdoLight 설치 프로그램에서 ‘구성 변경’ 시 GomdoLight 엔진이 손상되는 문제 해결
Fixed: Reconfiguring GomdoLight would end up corrupting GomdoLight Engine - [2017. 9. 8. 5.3bis] 수정: GomdoLight 온라인 업그레이드의 버전 체크 오류 해결
Fixed: GomdoLight Online Upgrade would report new release availability while running the latest version already
2017. 8. 15. GomdoLight KitKat Wave 5, Revision 2 – for Pantech VEGA IRON2
업데이트 수준update level: 중규모medium
중요성importance: 매우 높음critical
변경점changelog:
- 개선: 오류 수정 및 안정성
Improved: Bug fixes and stability improvements - 개선: 호환성 및 밀행성
Improved: Compatibility and unobservability improvements - 개선: GL 시스템 이미지 복원 절차가 사용자에게 더 많은 정보를 제공
Improved: GomdoLight System Image Backup/Restore now provides more information - 변경: 더 이상 설치 시 사용 설명서를 자동으로 표시하지 않음
Changed: GomdoLight no longer automatically displays Online User’s Manual when installed/upgraded/repaired. - 변경: ONE store 처리방식을 바꿈 – 더 이상 앱 관리자에서 제공하지 않고 설치 시에 비활성화 옵션 제공 (단, 기존 사용자는 현행 방식 유지)
Changed: GL App Manager no longer provides ‘ONE store’ app, and GomdoLight Installer now provides an option to disable it (for new users only) - 추가: (PAN, KitKat) GomdoLight 설치 시 구성 설정 과정에 미디어 커버의 비활성화 옵션 추가
Added: GomdoLight Installer now provides an option to disable ‘Media Cover’ - 제거: ‘disable.superuser.manager.installer’ 플래그 지원 중단
Removed: ‘disable.superuser.manager.installer’ Flag is now deprecated and no longer supported
2017. 6. 16. GomdoLight KitKat Wave 5, Revision 1 – for Pantech VEGA IRON2
업데이트 수준update level: 중규모medium
중요성importance: 높음high
변경점changelog:
- 버그 수정
Bugfixes - 기능 추가: GomdoLight 호환성 모드 (일부 앱과의 호환성 향상, ‘gomdolight.compatibility.mode’ 플래그로 사용)
Added: GomdoLight Compatibility Mode (Improves compatibility with some sensitive apps, used with ‘gomdolight.compatibility.mode’ Flag) - GomdoLight 엔진 최적화 및 은밀성 향상
Improvements: Better optimization and detection avoidance capability.
2017. 4. 30. GomdoLight KitKat Wave 5, Initial Release – for Pantech VEGA IRON2
업데이트 수준update level: 대규모major
중요성importance: 매우 높음critical
변경점changelog:
- 완전히 새로운 GomdoLight
A WHOLE NEW GOMDOLIGHT - 내부 구조 일신, 안정성 및 은밀성 대폭 향상
Improvements: Totally new internal structure, enhanced reliability and detection avoidance capability. - 알려진 모든 버그 수정
Bugfixes: All known bugs fixed
GomdoLight KitKat Wave 4
과거 릴리스 기록 및 변경점 안내: http://cafe.naver.com/gomdolight/10056
과거 업데이트 내역을 주의 깊게 읽는 것도 문제 해결에 큰 도움이 됩니다.
IX. GOMDOLIGHT TOOLS
GomdoLight Sideloader. Used when ▶ Directly installing GomdoLight onto the Sideloader-supported devices.
Detailed information on EasyMod and a download link for the EasyMod template file. For more information refer to ▶ ‘Installing third party mods’ section.
X. SUPPORT
Support is done in the forums. DO NOT USE PM TO ASK QUESTIONS. Use the board so that others can participate in the support process, and the solution to your problem is made available to the public.